Skip to Content

Blog Archives

IT4Charity Skopje

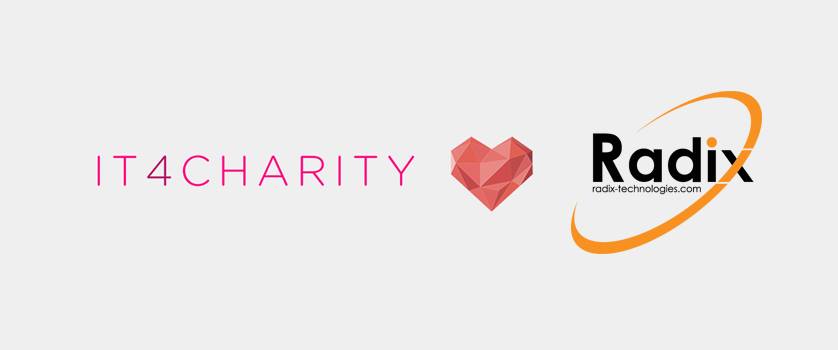
We are very happy to announce that we are a proud supporter of the IT4Charity event in Skopje.

The guys and girls of our Skopje office will be attending this event on the 16th of November in XO Club in Skopje.

This event is organized to help people in need in developing Macedonia, and the funds gathered at the event will be donated to SOS Detsko Selo Macedonia, an organization that is dedicated to improving the lives of homeless children by providing housing, education, and courses of those in need.

At the event itself there will be donation boxes in which everyone can contribute with their own amounts. More info and details of the event here.

Entry is free, party starts at 20:00!

Hope to see you there, IT people of the Skopje area!

radix

0 1 Continue Reading →

Crowd Cloud Camp – Internship Program

We are very proud to announce that our official internship program called Crowd Cloud Camp is now open!

This is a program that was created by our development partners ITCrowd along with us here at Radix Technologies. Within this program young students and fresh graduates can take part in actual projects and attain knowledge in some of the most used Cloud platforms, enterprise level solutions that are used for managing large networks, as well as some of the most used programming languages and the most used methods for project management in IT.

Besides the technical capabilities that our students can acquire within Crowd Cloud Camp, we also provide them with courses that can improve their soft skills, such as presentation, writing skills, foreign languages, personal communication, developing emotional intelligence at work, etc.

With over 20 experts at our disposal we have made sure that the students learn from the best trainers, some with over 15 years of experience in fields such as programming, network management, system administration, Microsoft technologies, Cloud Platform experts as well as language and communication experts.

In terms of technical skills, knowing the following is preferable:

  •  Programming languages
  •  Some DB management experience
  •  Analytical and problem-solving skills
  •  Knowledge of Microsoft Technologies
  •  Network Management skills
  •  Android and iOS technologies


Follow Crowd Cloud Camp on their official social media for the latest information regarding the program:

Facebook

Twitter

Instagram

Linkedin

So, if motivation, dedication and eagerness to learn new technologies and languages are your characteristics – we are expecting you!

Crowd Cloud Camp!

ccclogo

0 1 Continue Reading →

RadixCloud Lead Generation Apprentice Program

We are extremely excited to show you the picture below, which has all the necessary info for you to be become a part of our RadixCloud Lead Generation Apprentice Program!

People from Macedonia, feel free to send us your CV!

Job add

0 3 Continue Reading →

Adding Websites to InfiniteWP dashboard

My last week blog post was about how you can maintain a large number of WordPress sites with InfiniteWP and how you can install it. This week will be about connecting your WordPress websites to the InfiniteWP dashboard. Wordpress websites that needs maintenance need to have InfiniteWP Client plugin installed. It’s a really straightforward process.

Login in to your WordPress website, go to Plugins -> Add New, in the right side type InfiniteWP Client and press Enter. The search will return the results and Click Install Now Button next to the InfiniteWP Client title. After installation click activate now to active the plugin.

wordpress_install_plugin

This will provide you with three fields: the website Admin URL, Admin Username and Activation Key. You can copy the entire data with the green Copy Details button or write it in a notepad.

wordpress_infinite

Now back to the InfiniteWP dashboard to add a new website. Go to the bottom left corner and click the Add Website button.

wamp_iwp_dashboard

This will give you a popup with the same information as in your Wordpress website earlier so enter the following:

  • WP-Admin URL: The URL to you backend admin login
  • Admin Username: Your WordPress website Admin username
  • Activation Key: the activation key from the InfiniteWP Client plugin

To make things even easier if you clicked Copy Details just go CTRL+V (for Windows) and it will fill all the necessary information.

After filling the form click the Add Site button and that is it.

wamp_activate_page

You InfiniteWP Admin dashboard now communicates with you WordPress website and you can see all your WordPress core, plugins, themes or themes frameworks necessary updates. As you can see we have few updates to make to our website. If you click on the green bar you will get a more detailed view of the versions and what category is that needs to be updated.

InfiniteWP_radix

You can now add as many websites as you like that need your attention and maintenance. Next week we will update to the website to the latest version.

Dragan Markovski, 

Lead Web Developer/Programmer @RadixCloud

0 2 Continue Reading →

How to maintain a large number of WordPress sites – easy

When you are a super awesome hosting company that offers a variety of services for our customers such as building their websites, there comes a time when maintenance of the same is also required. Customers want to stay up to date the with the most recent core updates, plugins or themes.

For most developers which have 2-3 websites to maintain logging individually might work, but having more than 150 websites simply won’t cut it. It wastes time, it’s ineffective and often tedious work going on every single admin dashboard URL, logging in, updating through the menus, notifying the customer and logging out.

This post is about maintaining the WordPress websites that we host and sometimes create, and how we maintain a large number of websites all to the latest version from a single central dashboard.

I will guide you with a step-by-step tutorial on how to install infiniteWP.

You need to download InfiniteWP dashboard which is all in one solution for your WordPress websites. Most important of all it’s free. The only thing, if you want to pay for, are the extra plugins. So go to this link https://infinitewp.com/installing-options/ enter your email and click download now. You will receive a zip file.

The dashboard works either with a local server such as XAMPP or WAMP, or you can go with a server through FTP/SFTP. Either way will work. In this example i use WAMP which is Apache + MySQL + PHP for Windows. If you want to go with the local version of the installation you can download WAMP on this link https://www.wampserver.com/en/#download-wrapper . The installation for WAMP is pretty simple, but if you are having difficulty you can check our post here. The minimal requirements for InfiniteWP are PHP v5.2.4 or higher with CURL support and MySQL v5.0.2 or higher. WAMP does come with all the necessary requirements.

After starting up WAMP which is in the lower right corner with a green icon W, go to your WAMP installation folder and to your WWW folder. The default path is C:\wamp\www. Here just unzip and paste the IWPAdminPanel_xx folder. After unzipping you can rename the folder name if you wish. We are also keeping all the files in the folder IWPAdminPanel_xx because you might want to have multiple projects in the future, so each gets it’s own folder on your localhost.

wamp_folder

Next we need to create a database with phpmyadmin which is done through a browser with the url localhost/phpmyadmin. Log in with you username and password (default username is root and password blank), and click on the new. You will get a form on the right side so just enter the name and click Create. My database name is IWP.

wamp_phpmyadmin

Now it’s time for the installation of our InfiniteWP dashboard. In a browser type in localhost/your_folder_name, in my case it’s localhost/iwpa. The first step is the license agreement, click Agree & Install button.

wamp_license

The second step checks the requirements that the InfiniteWP dashboards uses and if everything is all right you will get green OK on the right side. Click on Next DB details button. Also this step is automatically skipped if everything checks out.
wamp_php

This third step requires all the Datatabase settings for InfiniteWP. For a localhost set the following values in the form DBHost – localhost, DB Port – 3306, DB name – iwp (your db name from phpmyadmin), DB Table Name Prefix – iwp_ (it can be set to whatever you want), DB Username – root and DB password – your password. If you don’t have a database password set leave the field blank. For a live server you need to enter your settings according to the hosts documentation of ports and DB settings. Click Next, Create Login.

wam_dbsettings

Your login is with an email address and the desired password setting. The same email is used for password recovery. The password needs to be at least 6 characters and it’s good to have lowercase/uppercase letters, numbers and signs. The strength of the password is also show. Click on the Next, Install for the installation process to begin.

wamp_login

If the installation was successful you will get the following screen. Click the green Open my admin panel.

wamp_install

Enter your previously entered login email and password into your login screen.

wamp_InfiniteWP

For a newly installed InfiniteWP you need to have some security settings, such as HTTPS enabling and IP restrictions, however we will not cover this in this blog post. We will have a separate blog post specifically for how you can protect your dashboard and make those settings. Click Continue.

wamp_securiity

The final screen asks for a data collection if you are willing to improve upon InfiniteWP. That’s it Click Done and Open the app.

wamp_openApp

Now you are ready to add your websites inside the InfiniteWP dashboard. We will cover adding websites and backups in the next blog post.


Dragan Markovski, 

Lead Web Developer/Programmer @RadixCloud

0 2 Continue Reading →

How to fix a suspect database

One of the relatively common situations during disaster recovery is a suspect database. The suspect flag is a mode which is set to the database by SQL Server in several cases. When it comes to disaster recovery, mainly databases are marked as suspect in case of a hardware failure, improper shutdown of the DB server, DB files corruption, etc. Strangely enough, it can happen when you restore the entire DB server from a valid snapshot (it happened to me).

In such cases, you will need to bring the database back to online mode. At this point you need to be aware that during the process there may be some data loss. This can occur if there are incomplete transactions which will need to be rolled back. In general,

What you will need for the procedure is the SQL Server Management Studio. I will use the Prime database which I corrupted in the previous post 🙂

The first thing you need to do is to turn off the suspect flag (which does not mean that the DB is fixed). You will need to execute the following command:

EXEC sp_resetstatus ‘Prime’

You will get the following message:

1

The next step is to set the database into emergency mode, which will make it a read-only with the following command:

ALTER DATABASE Prime SET EMERGENCY

2

Then, perform a consistency check. The output will display any possible errors.

DBCC checkdb(‘Prime‘)

3

In the next step we do a rollback of any pending transactions. This step also brings the DB in a single user mode.

ALTER DATABASE Prime SET SINGLE_USER WITH ROLLBACK IMMEDIATE

4

Finally, we will correct any reported errors. Keep track of the time, since this may be a lengthy process.

DBCC CheckDB (‘Prime‘, REPAIR_ALLOW_DATA_LOSS)

5

To wrap up the procedure, we will need to enable the multi user access and bring it online.

ALTER DATABASE Prime SET MULTI_USER

6

If we check the DB status now, it will be shown as online. We can browse through the tables and query data:

select DATABASEPROPERTYEX(‘Prime‘, ‘status’)

7


Jana Georgievska,

DBA

0 1 Continue Reading →

How to add SSL encryption to your website for free

Anyone that has set up a web or an application server knows how challenging it is to deal with requesting, verifying and install an SSL/TLS certificate is. Fast forward into the future of today…

Let's Encrypt!
Let’s Encrypt is a certificate authority that has been created by the Linux Foundation with community support to tackle these challenges, a big part of EFF’s mission to encrypt the Web. They claim: “No validation emails, no complicated configuration editing, no expired certificates breaking your website. And of course, because Let’s Encrypt provides certificates for free, no need to arrange payment.”

There are 1,358,780 certificates issued to date and that number is growing by the minute. You can check all the issues certificates here.

The official client software “Certbot” is easy to use and completely open source.
certbot
You can grab it and see the help file using the following command:

$ git clone https://github.com/certbot/certbot && cd certbot && chmod a+x certbot-auto && ./certbot-auto —help

To create a certificate and reconfigure apache to use it on a Centos6 machine this should do the trick.

sudo ./certbot-auto --apache --email youremail@yourdomain.tld --agree-tos --webroot -w /var/www/html/ -d subdomain.domain.tld -d www.subdomain.domain.tld

For more advanced and automated configuration instruction visit the Certbot homepage. If you need any help leave a reply in the comment section.

Martin Markovski,
Director Of Technology

0 4 Continue Reading →

Radix Technologies Video

A short video depicting our capabilities. Enjoy and share! 🙂

0 1 Continue Reading →

Radix Technologies @Job Fair-Macedonia

We are very excited to announce that RadixCloud will be a part of this year’s Job Fair in Skopje Macedonia!

A part of our team will be at stand  #7 at the Faculty of Computer Sciences and Engineering, where young IT professionals or IT enthusiasts will be able to get to know our services better, as well as get to know what is it like to be part of the RadixCloud process. Within our stand, people will be able to experience working on test environments that our engineers will provide for young students to work and see how running a process in a Managed Service Provider company actually looks like! We are looking forward to meeting young minds and  IT enthusiasts that are looking for a position in a IT company that provides a complete set of IT services.

Follow our official FB event for the fair for more information, and of course if you attend come say hi!

We would also like to add that we are felling very very, very…

IMG_4029


0 1 Continue Reading →