When you are a super awesome hosting company that offers a variety of services for our customers such as building their websites, there comes a time when maintenance of the same is also required. Customers want to stay up to date the with the most recent core updates, plugins or themes.
For most developers which have 2-3 websites to maintain logging individually might work, but having more than 150 websites simply won’t cut it. It wastes time, it’s ineffective and often tedious work going on every single admin dashboard URL, logging in, updating through the menus, notifying the customer and logging out.
This post is about maintaining the WordPress websites that we host and sometimes create, and how we maintain a large number of websites all to the latest version from a single central dashboard.
I will guide you with a step-by-step tutorial on how to install infiniteWP.
You need to download InfiniteWP dashboard which is all in one solution for your WordPress websites. Most important of all it’s free. The only thing, if you want to pay for, are the extra plugins. So go to this link https://infinitewp.com/installing-options/ enter your email and click download now. You will receive a zip file.
The dashboard works either with a local server such as XAMPP or WAMP, or you can go with a server through FTP/SFTP. Either way will work. In this example i use WAMP which is Apache + MySQL + PHP for Windows. If you want to go with the local version of the installation you can download WAMP on this link https://www.wampserver.com/en/#download-wrapper . The installation for WAMP is pretty simple, but if you are having difficulty you can check our post here. The minimal requirements for InfiniteWP are PHP v5.2.4 or higher with CURL support and MySQL v5.0.2 or higher. WAMP does come with all the necessary requirements.
After starting up WAMP which is in the lower right corner with a green icon W, go to your WAMP installation folder and to your WWW folder. The default path is C:\wamp\www. Here just unzip and paste the IWPAdminPanel_xx folder. After unzipping you can rename the folder name if you wish. We are also keeping all the files in the folder IWPAdminPanel_xx because you might want to have multiple projects in the future, so each gets it’s own folder on your localhost.

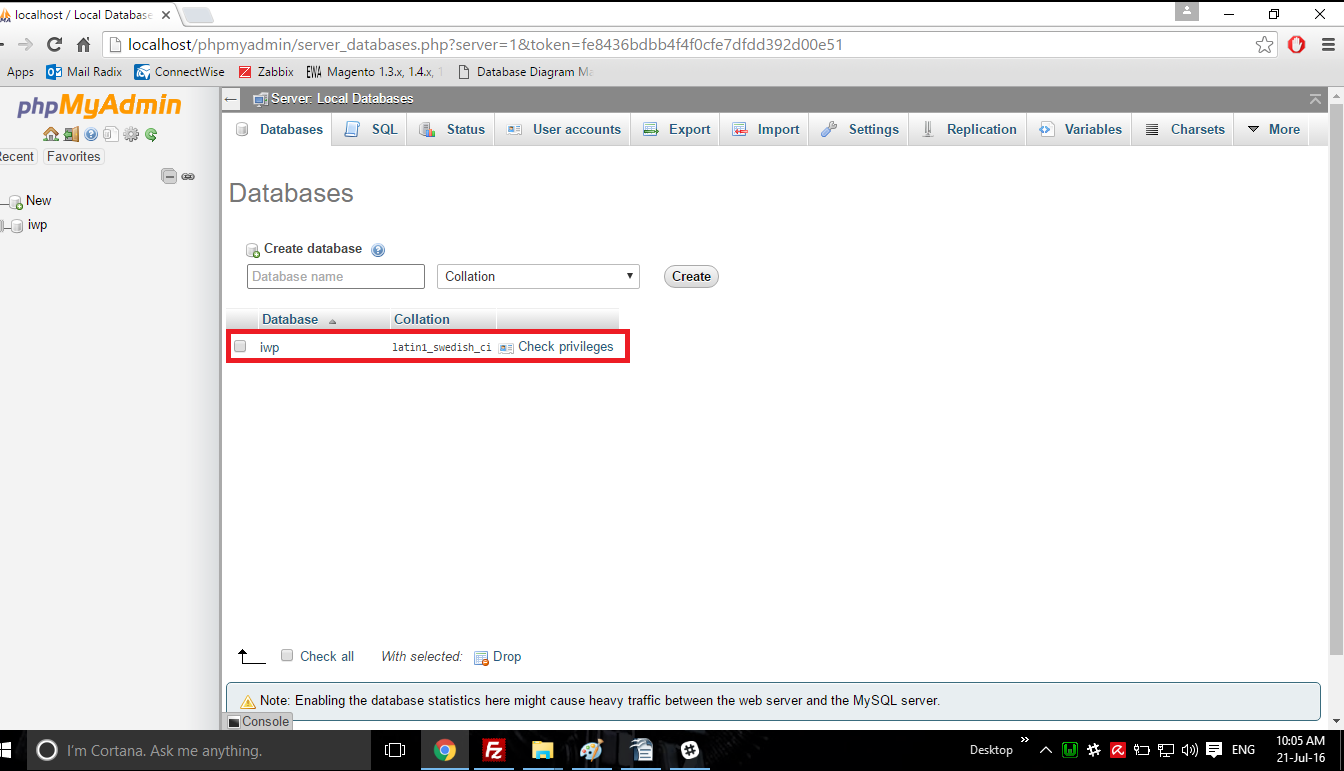
Next we need to create a database with phpmyadmin which is done through a browser with the url localhost/phpmyadmin. Log in with you username and password (default username is root and password blank), and click on the new. You will get a form on the right side so just enter the name and click Create. My database name is IWP.
Now it’s time for the installation of our InfiniteWP dashboard. In a browser type in localhost/your_folder_name, in my case it’s localhost/iwpa. The first step is the license agreement, click Agree & Install button.

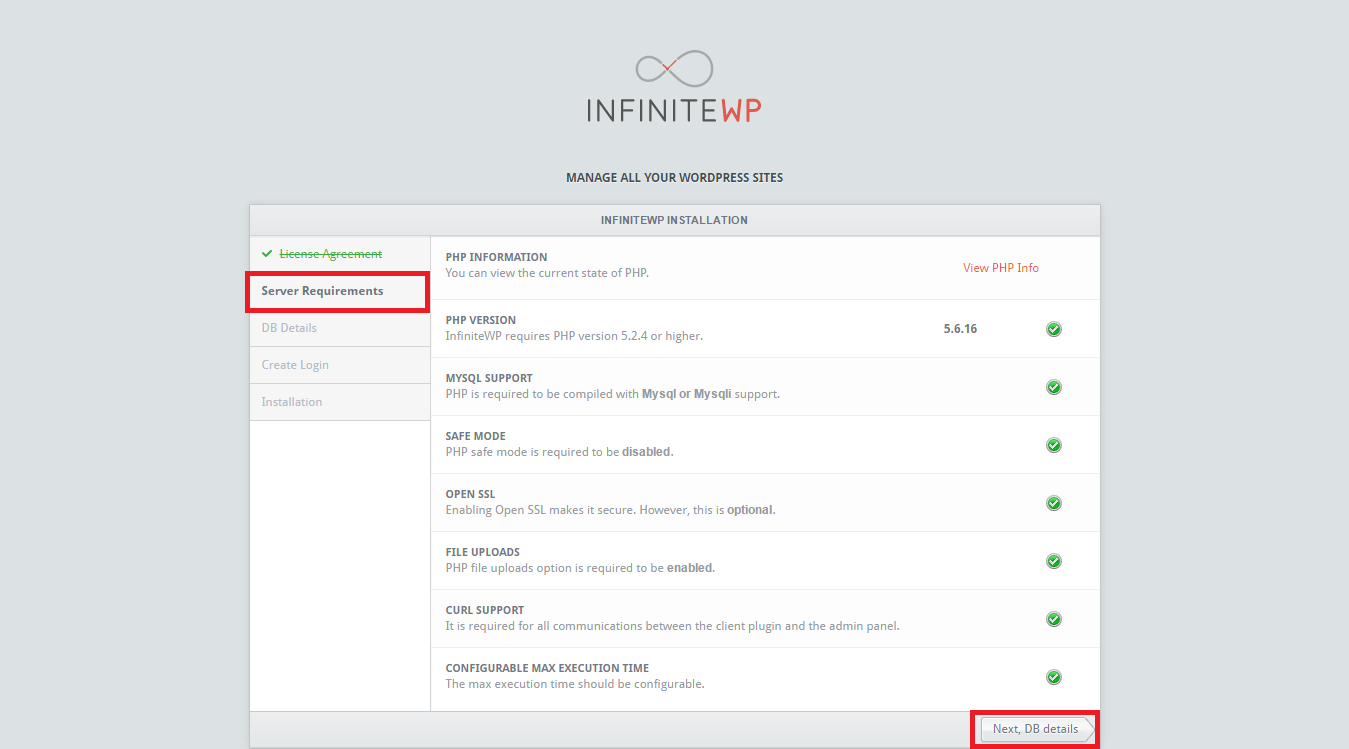
The second step checks the requirements that the InfiniteWP dashboards uses and if everything is all right you will get green OK on the right side. Click on Next DB details button. Also this step is automatically skipped if everything checks out.
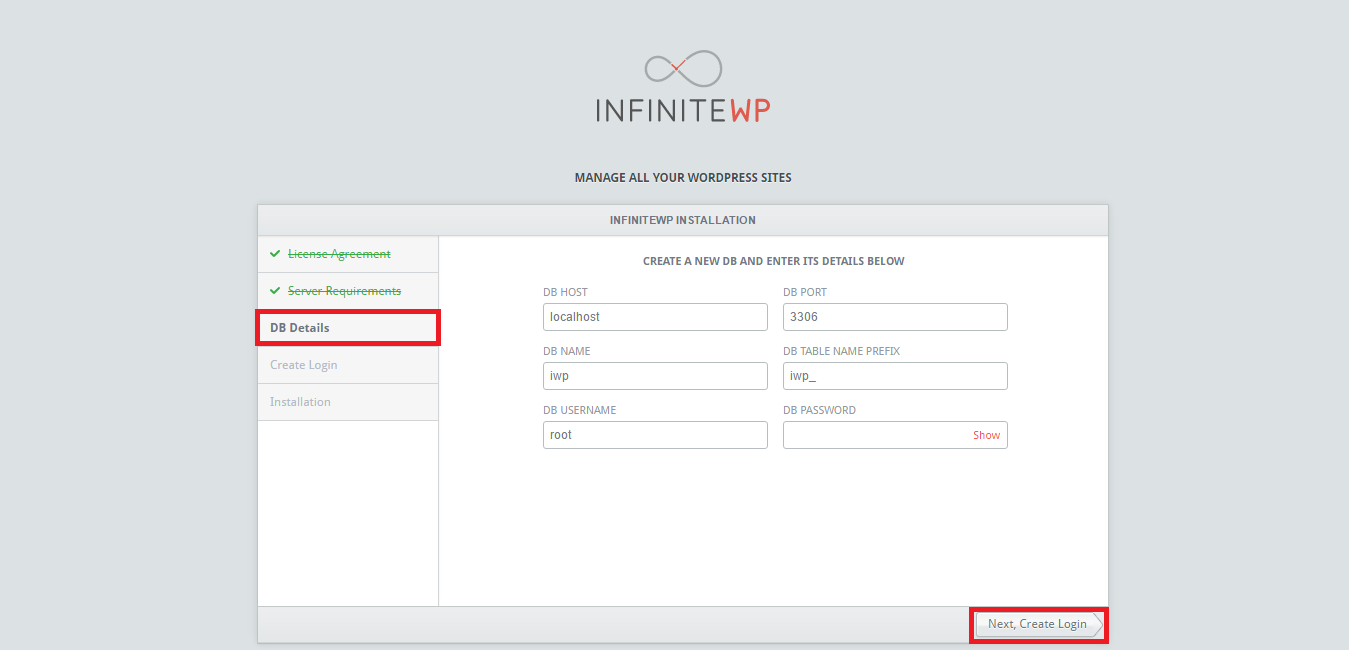
This third step requires all the Datatabase settings for InfiniteWP. For a localhost set the following values in the form DBHost – localhost, DB Port – 3306, DB name – iwp (your db name from phpmyadmin), DB Table Name Prefix – iwp_ (it can be set to whatever you want), DB Username – root and DB password – your password. If you don’t have a database password set leave the field blank. For a live server you need to enter your settings according to the hosts documentation of ports and DB settings. Click Next, Create Login.
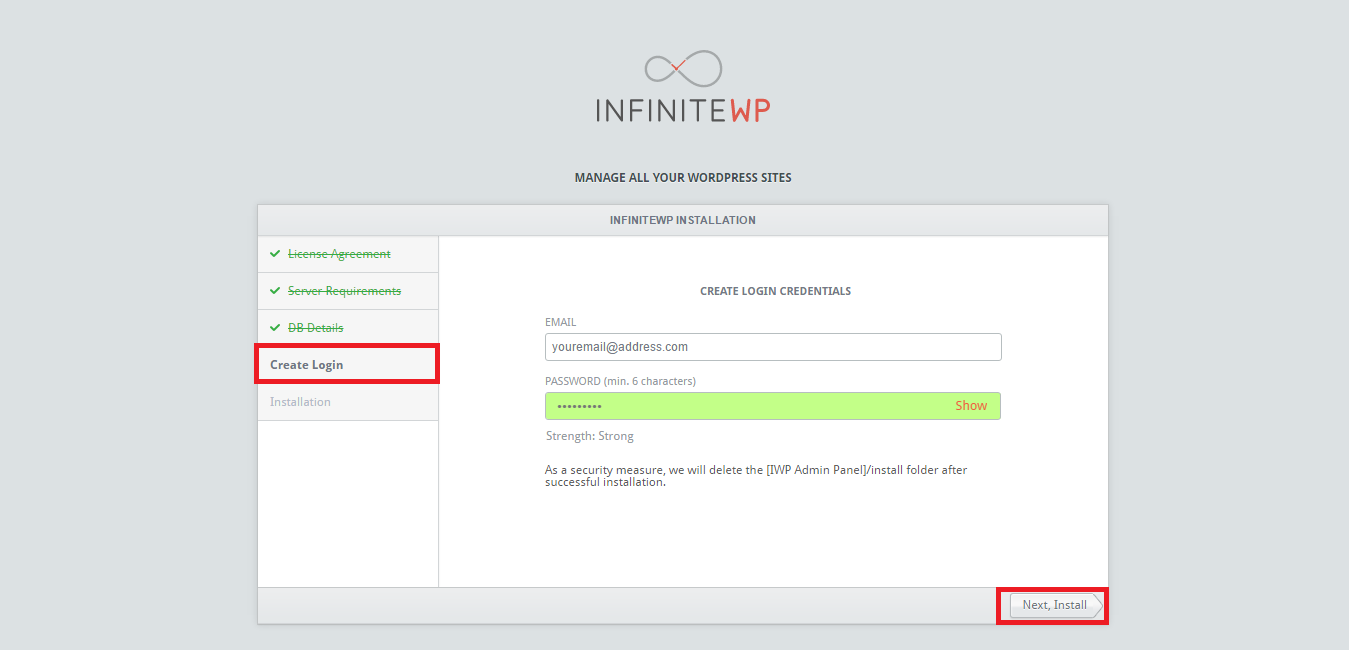
Your login is with an email address and the desired password setting. The same email is used for password recovery. The password needs to be at least 6 characters and it’s good to have lowercase/uppercase letters, numbers and signs. The strength of the password is also show. Click on the Next, Install for the installation process to begin.
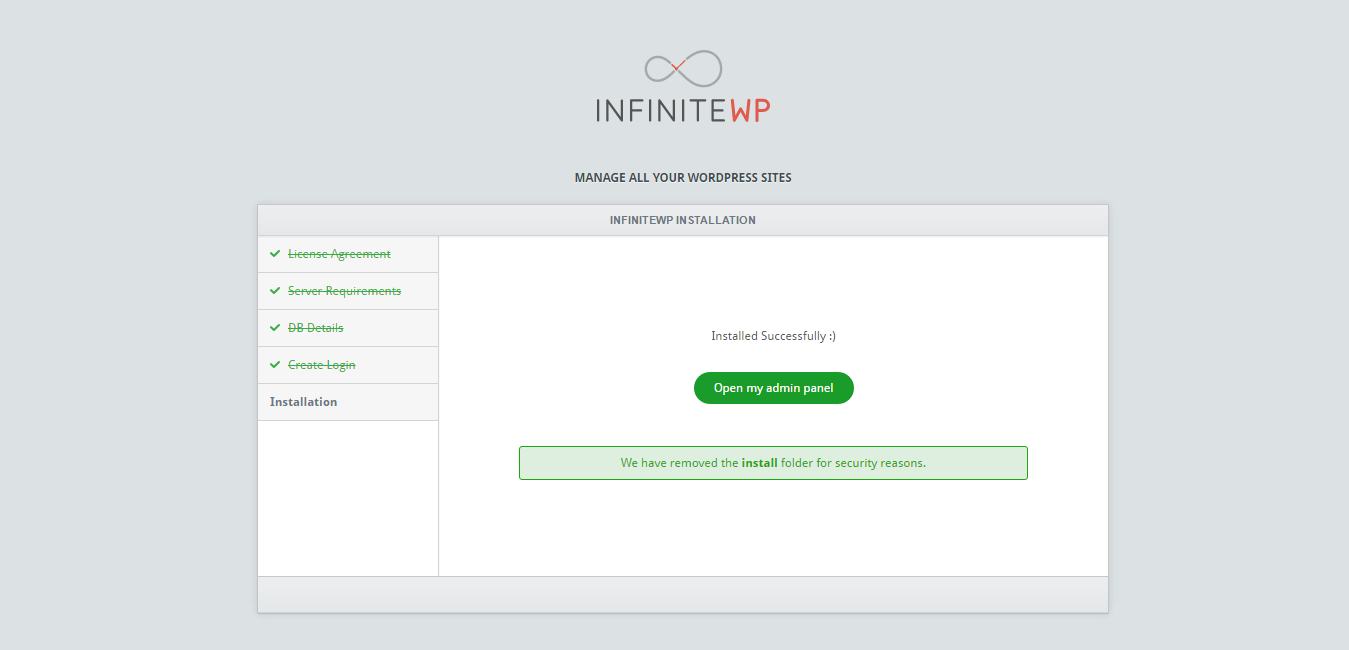
If the installation was successful you will get the following screen. Click the green Open my admin panel.
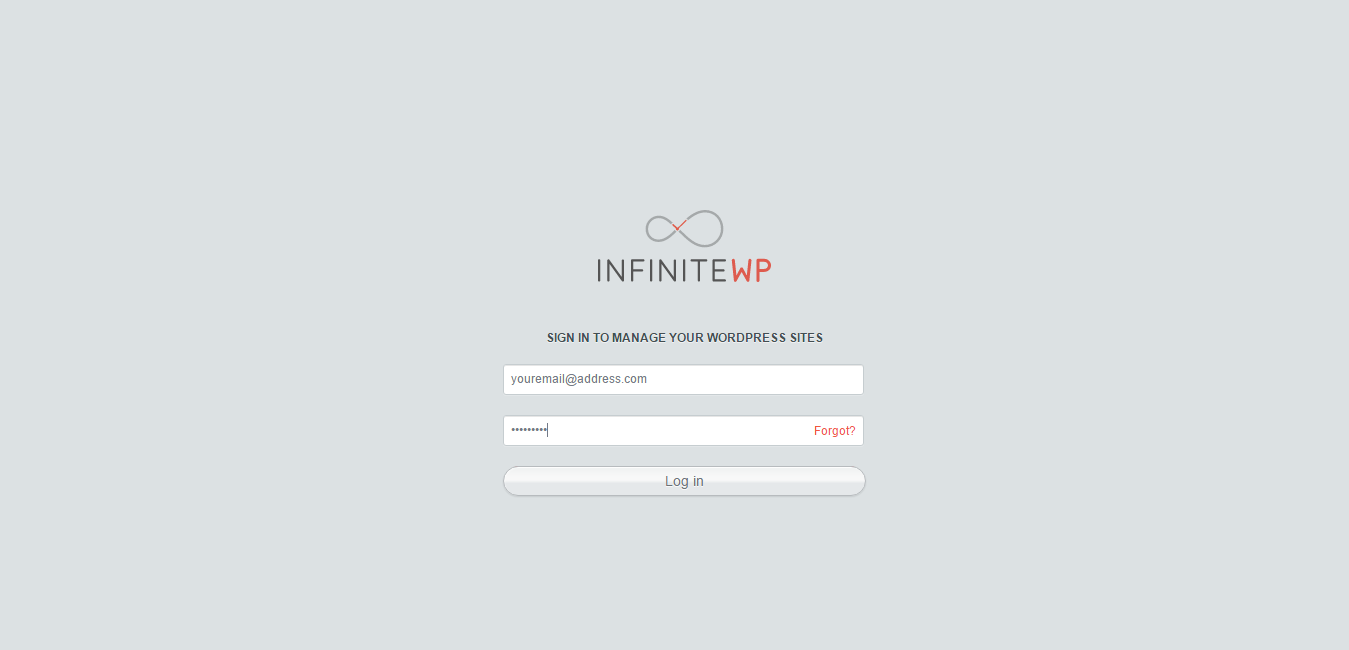
Enter your previously entered login email and password into your login screen.
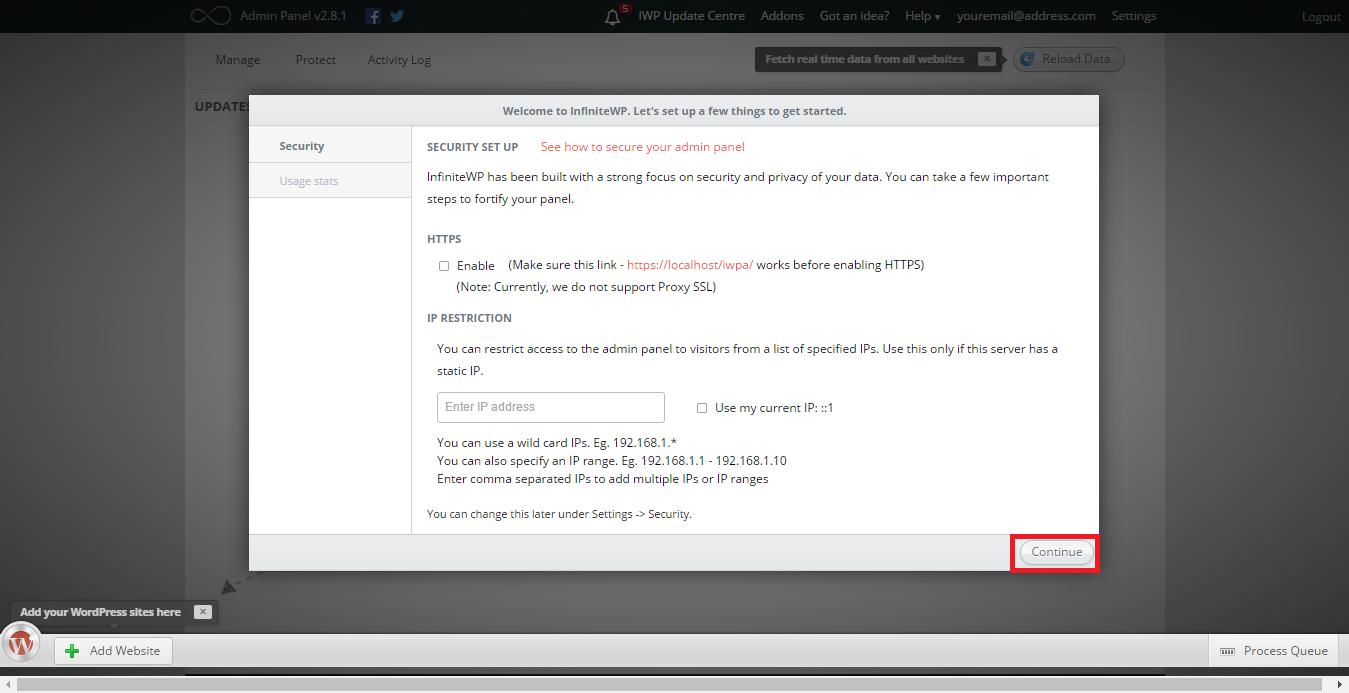
For a newly installed InfiniteWP you need to have some security settings, such as HTTPS enabling and IP restrictions, however we will not cover this in this blog post. We will have a separate blog post specifically for how you can protect your dashboard and make those settings. Click Continue.
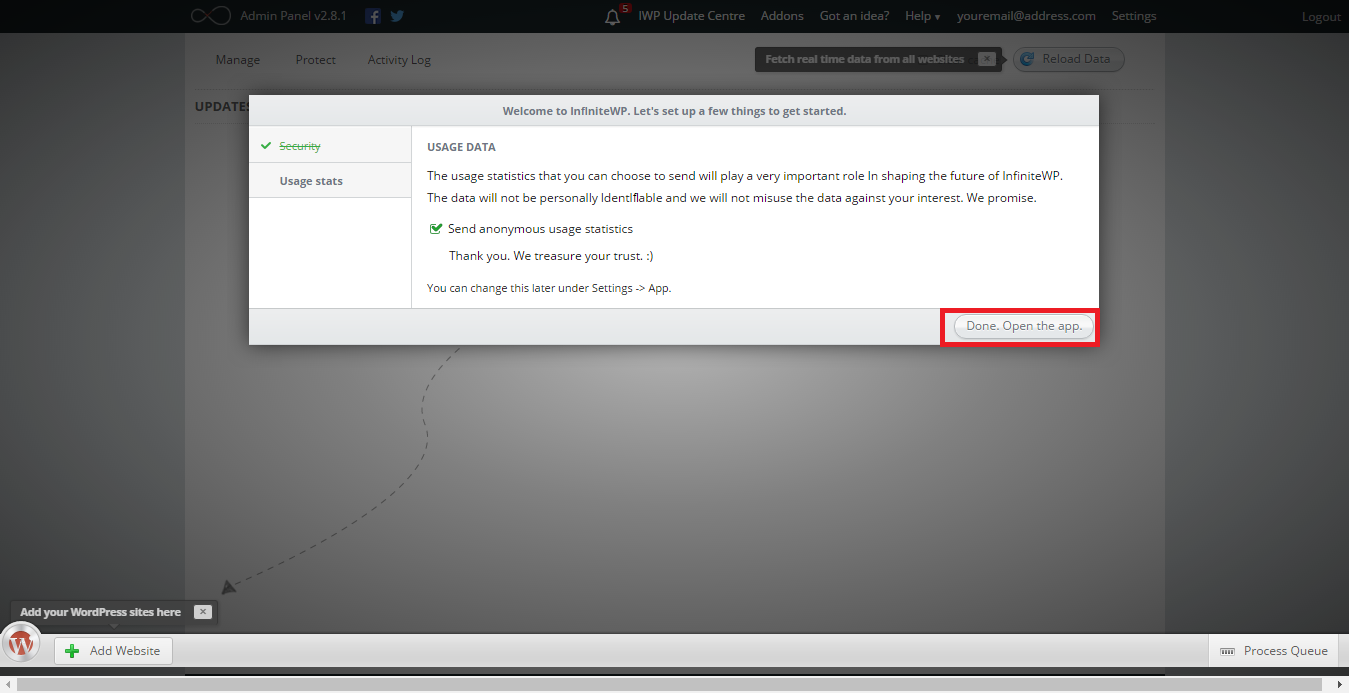
The final screen asks for a data collection if you are willing to improve upon InfiniteWP. That’s it Click Done and Open the app.
Now you are ready to add your websites inside the InfiniteWP dashboard. We will cover adding websites and backups in the next blog post.
Dragan Markovski,
Lead Web Developer/Programmer @RadixCloud


 Deutsch
 Français
 Македонски